Extra information
System documentation: Shopify GraphQL API ReferenceConnector package documentation
Table of Contents
- 1. Setting up HTTP Client Shopify GraphQL
- 1.1 Steps
- 2. Subscribing using Shopify GraphQL
- 2.1 Steps
- 2.2 General concept
- 3. Publishing using Shopify GraphQL
- 3.1 Steps
- 3.2 General concept
1. Setting up HTTP Client Shopify GraphQL
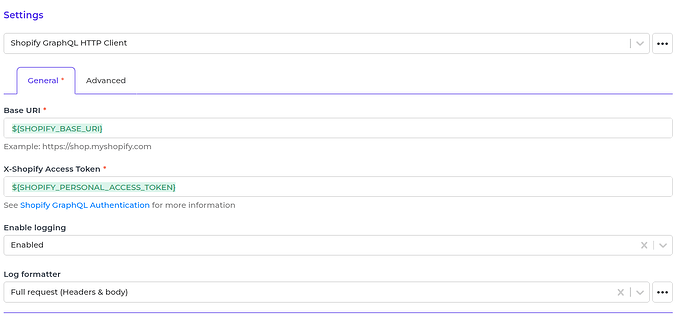
1.1 Steps- In the Alumio Dashboard, go to Clients -> HTTP Clients. Create a new HTTP Client.
- Select Shopify GraphQL HTTP Client as PlatForm and click next step
- Fill in the Base URL and X-Shopify Access Token. (See the Shopify GraphQL Documentation
- You can optionally enable logging of request to get the log of the authentication.
- Click next step, fill the name of the HTTP Client and finally you can save the HTTP Client for use.
2. Subscribing using Shopify GraphQL
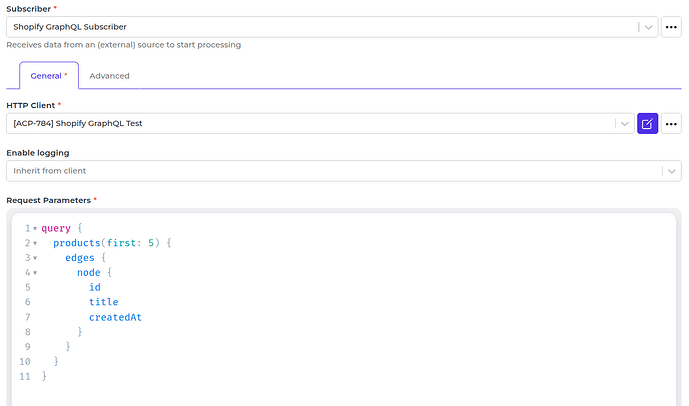
2.1 Steps- Go to Connections -> Incoming and create a new incoming configuration and select “Shopify GraphQL Subscriber” as the subscriber.
- Select the Shopify GraphQL HTTP Client to use.
- You can optionally change the logging behavior for the Subscriber.
- Fill any data that you want to request to Shopify GraphQL in the request parameters.
- You can optionally add a transformer to transform the request parameters into something you will request from Shopify GraphQL.
- You can also optionally enable follow pagination to allow Alumio fetches paginated entities.
/admin/api/2026-01/graphql.json
3. Publishing using Shopify GraphQL
3.1 Steps- Go to Connections -> Outgoing, create a new outgoing configuration and select “Shopify GraphQL Publisher” as the publisher.
- Select the HTTP Client to use.
- You can optionally change the logging behavior for the Publisher.
- Fill any data that you want to send to Shopify GraphQL in the Request Paramaters.


/admin/api/2026-01/graphql.json