Extra information
System documentation: https://help.afas.nl/help/EN/SE/App_Cnr_Rest_Api.htm Find shared AFAS configurations in our Exchange configuration category.Connector package documentation
Table of Contents
- 1. Setting up HTTP Client AFAS
- 1.1 Steps
- 2. Subscribing to Entities from AFAS
- 2.1 Steps
- 2.2 General Concept
- 3. Publishing Entity to AFAS
- 3.1 Steps
- 3.2 General Concept
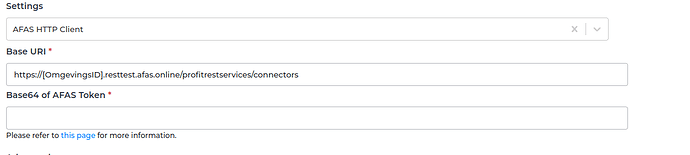
1. Setting up HTTP Client AFAS
1.1 Steps- In the Alumio Dashboard, go to Clients -> HTTP Clients.
- Create a new HTTP Client and select AFAS Client as the prototype of the HTTP Client.
- AFAS has a URL with an environment ID that needs to be filled in along with the Base64 of the AFAS token that you would like to use.
2. Subscribing to Entities from AFAS
2.1 Steps- Go to Connections -> Incoming, create a new incoming configuration and select AFAS Subscriber as the subscriber.
- Select the AFAS HTTP Client to use.
- (Optional) Add any request parameters needed to subscribe to the entity.
- (Optional) Add a transformer to modify the request parameters into something you need.
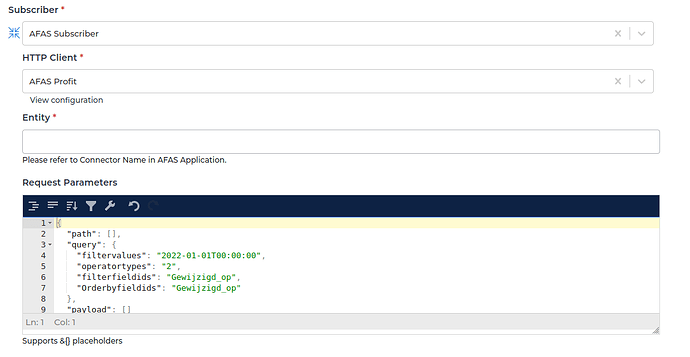

- “Path” is the path parameter of the url. For example the {id}.
- “Query” is defined set of parameters attached to the end of a url. For example: www.url.com?type=true&start=0
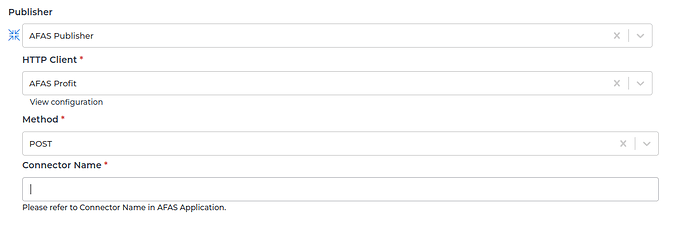
3. Publishing Entity to AFAS
3.1 Steps- Go to Connections -> Outgoing, to create a new outgoing configuration and select the AFAS – Entity Publisher as the Publisher.
- Optionally, you can also add any transformers to modify the data into anything you need before submitting it to AFAS.
- Select the AFAS HTTP Client to use.
- Fill in the AFAS connector name with the same one used in the AFAS application.
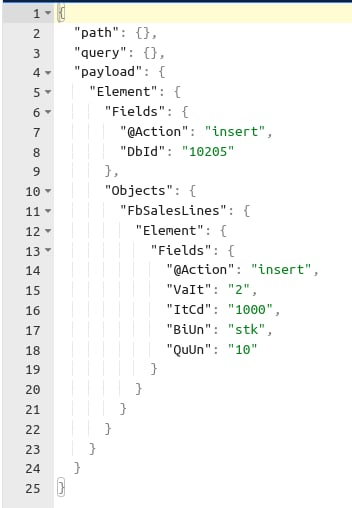
- “Path” is the path parameter of the url. For example the {id}.
- “Query” is defined set of parameters attached to the end of a url.
Example: www.url.com?type=true&start=0 - “Payload” is the data contained within a request.