
Extra information

System documentation:

Connector package documentation

Setting up HTTP Client EDesk Steps
  1. In Alumio Dashboard, go to Clients > HTTPS Client. Create a new HTTP Client and select EDesk HTTP Client as the prototype of the HTTP Client.
  2. Fill in the Base URI, Username, and Password
Subscribing to Entities from EDesk Steps
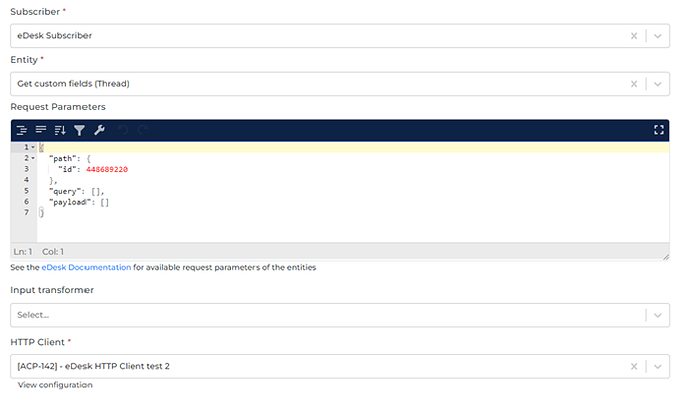
  1. Go to Connections -> Incoming and create a new incoming configuration and select EDesk Subscriber as the subscriber.
  2. Select the entity you want to subscribe from EDesk.
  3. Add any request parameters needed to subscribe to the entity (optional).
  4. You can optionally add a transformer to transform the request parameters into something you need.
  5. Select the EDesk HTTP Client to use.
General Concept We follow EDesk documentation on building this connector so you can easily use the connector based on EDesk API Reference. Entity It’s the entity you want to subscribe from EDesk. Please refer to the entities in Management APIs from the EDesk API Reference page. Request Parameters These are the parameters you can provide to get the needed entity based on EDesk API Reference. Please look at the example below on how to fill the Request Parameters field when Get custom fields entity eDesk connector screenshot 1 eDesk connector screenshot 2 That’s why we need to define the id property inside the path property in the Request Parameters field. The properties inside query parameters will be parsed as query parameters. Here is the final URL that will be called when using such Request Parameters field on the Get custom fields entity. /v1/threads/448689220/custom-field Input Transformer Any transformers set here will be executed after the Request Parameters are loaded. So, you basically can add any transformer to provide and transform the request parameters into anything you need either as path parameters and/or as query parameters of an entity. HTTP Client It’s the HTTP Client configuration or prototype you will use to access EDesk. Publishing Entity to EDesk Steps
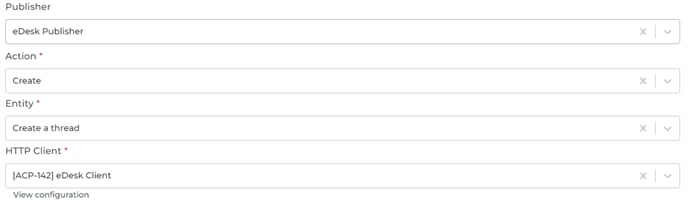
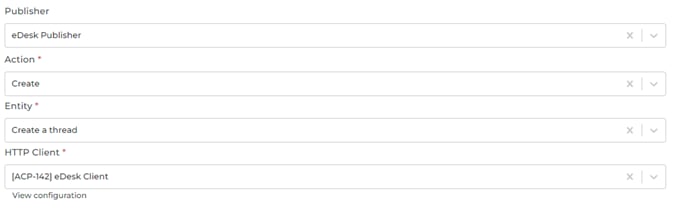
  1. Go to Connections -> Outgoing, create a new outgoing configuration, and select EDesk Publisher as the publisher.
  2. Select the action that you want the publisher to do with the data.
  3. Select the EDesk entity you want the data to be published.
  4. Select the HTTP Client to use. eDesk connector screenshot 3
General Concept Like the subscriber, the publisher has similar methods on how to use it. The difference is the payload that will be submitted by the publisher originating from the data (from routes, from transformers in outgoing configuration). Action Currently, we support Create (HTTP POST method), Put (HTTP PUT method), and Delete (HTTP DELETE method). Entity We support publishing to most EDesk endpoints. Please refer to the entities in Management APIs from the EDesk API Reference page. Based on the documentation, some endpoints may need one or more path parameters. For endpoints that require an object as the request payload, please look at the example below. For example, we want to Create a Thread. Please select “Create” as the action and “Create a Thread” as the entity of the publisher. eDesk connector screenshot 4 eDesk connector screenshot 5 You can put the payload you want to send to EDesk into the payload property in the data. Here is an example of the Possible Response after Creation. eDesk connector screenshot 6 Alumio will send an API request to EDesk with URL /v1/threads HTTP Client It’s the HTTP Client configuration or prototype you will use to access EDesk.