Fetching Categories from Akeneo
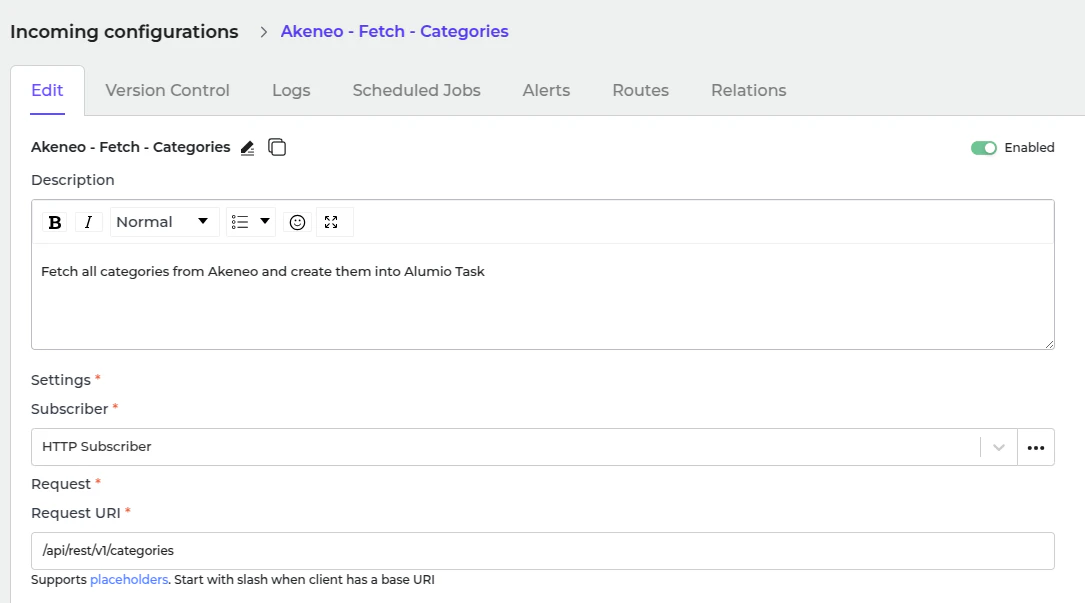
- In Alumio, go to “Integrations → Incoming → Akeneo - Fetch - Categories”.
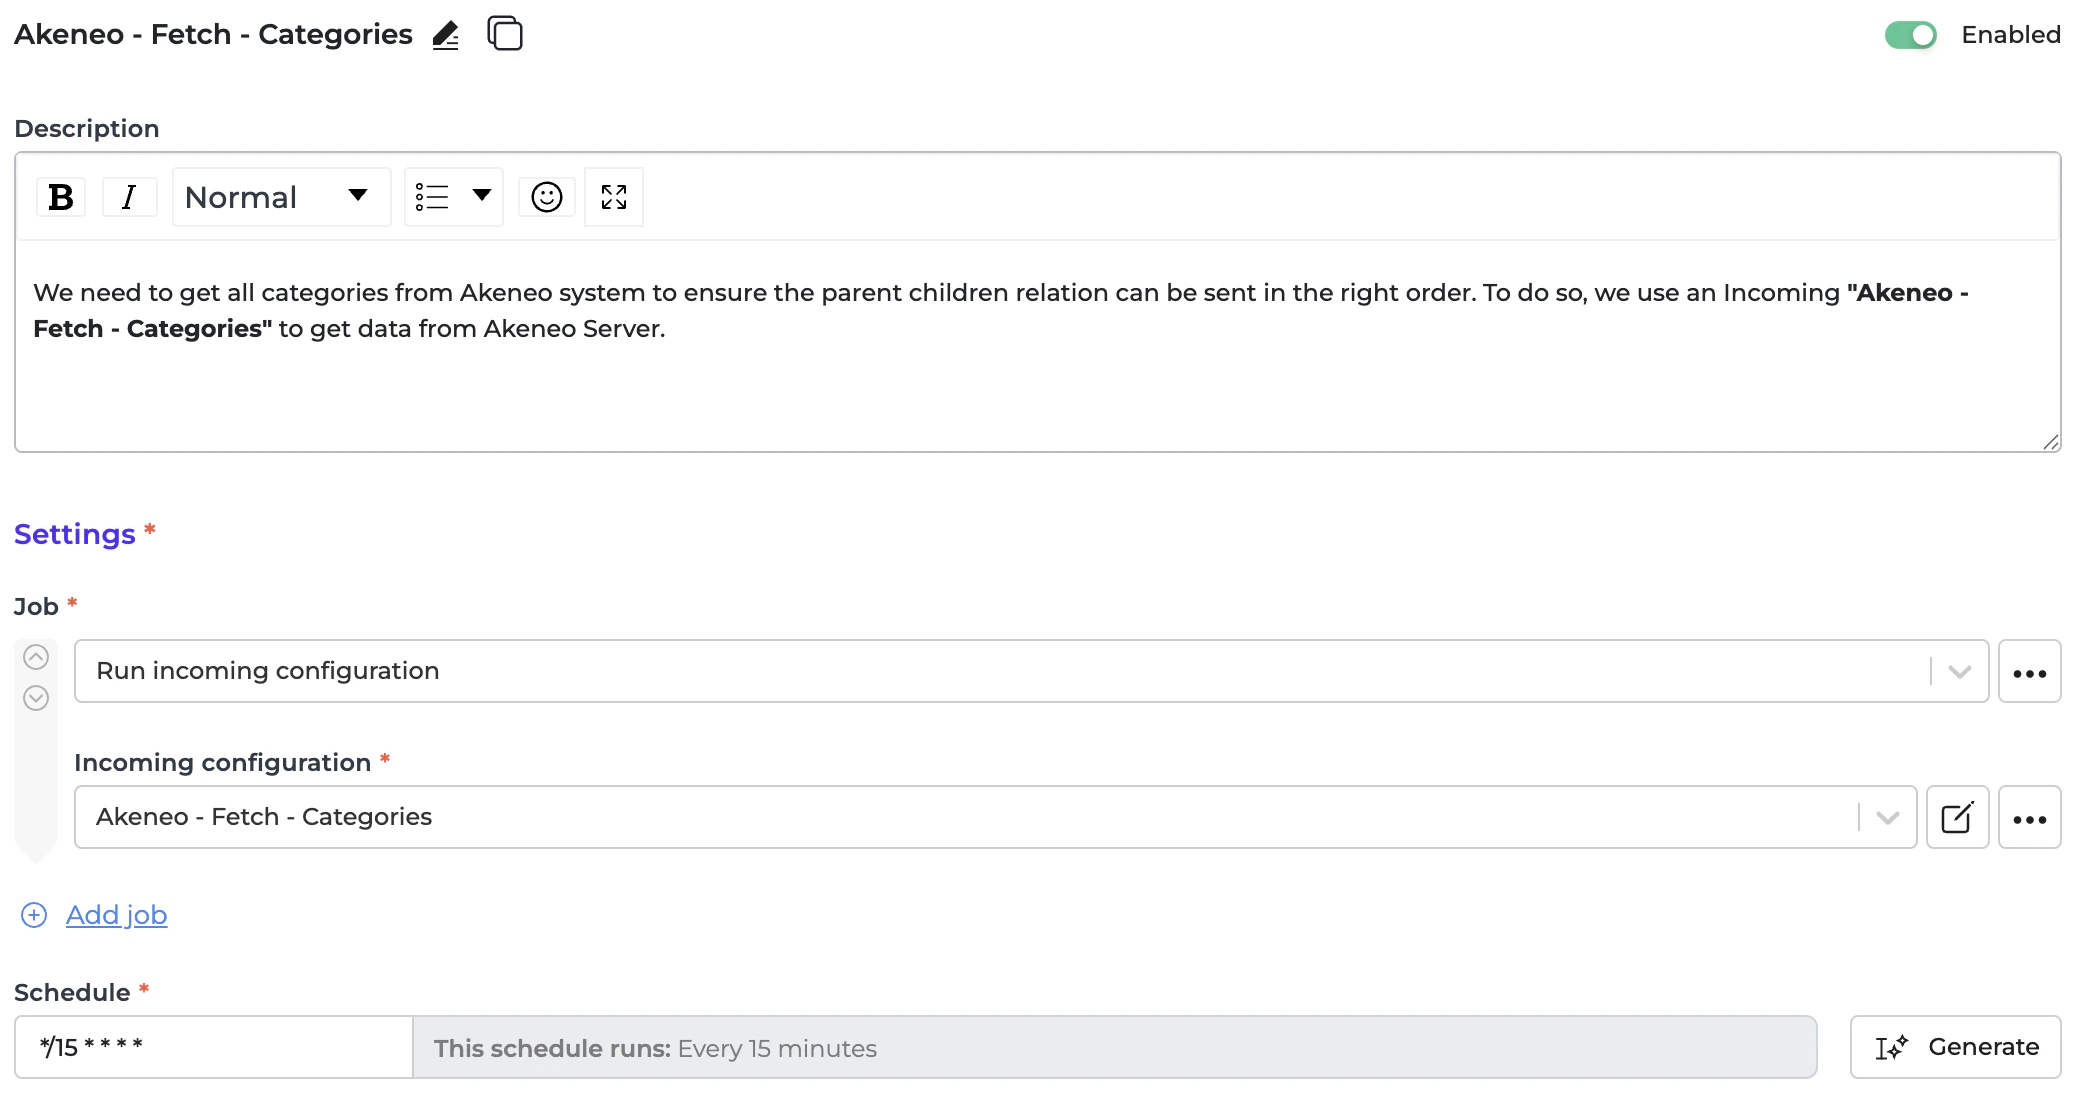
- To get all categories from the Akeneo system, use an Incoming “Akeneo - Fetch - Categories”.
- Akeneo - Prepare convert category - Labels - To localizations.
- Akeneo - Convert - Category - To Alumio Base.
- Akeneo - Filter - Category.
- Use this transformer to filter previously created tasks into task categories to avoid duplication.
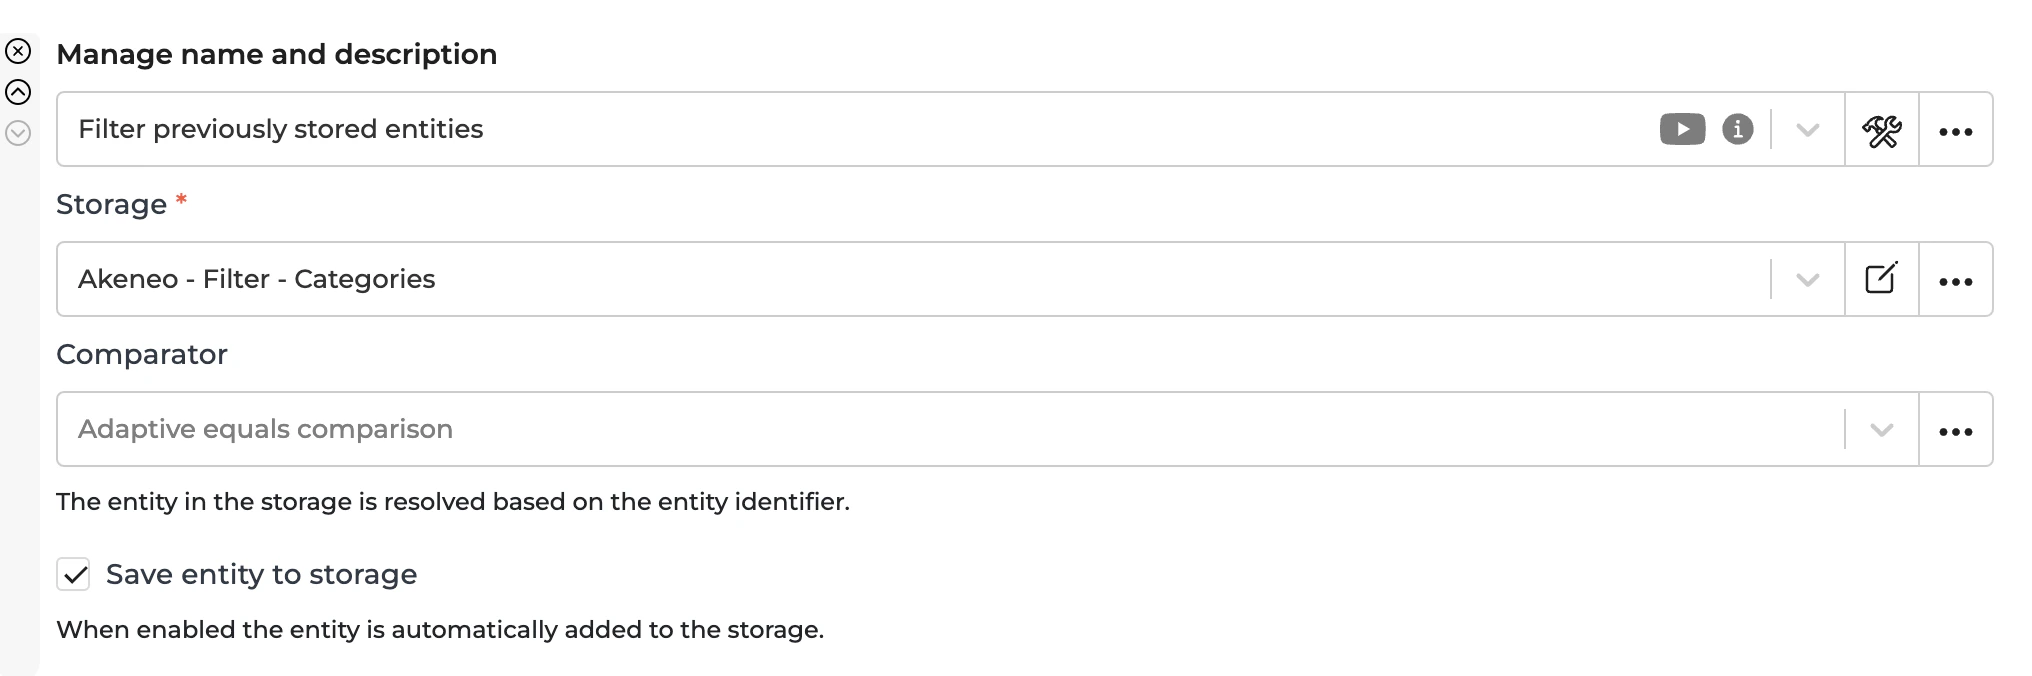
- To recreate a task, you should remove the entity from the storage “Akeneo - Filter - Categories”.
Sending Categories to Shopware
The task that was created through Incoming “Akeneo - Fetch - Categories” will then be processed further by the Route “Synchronize Categories - From Akeneo into Shopware” and will be sent using this Outgoing. This Outgoing will transform the Alumio Base Categories into Shopware one and check to create or to update the category with the data from this outgoing’s previous iteration. The sending in the Outgoing will be processed by the transformer:- Shopware - Prepare convert - Translations from Alumio Base
- Shopware - Prepare convert - Category - Parent from Alumio Base Category.
- Shopware - Convert - Category from Alumio Base Category
- Shopware - Check and send - Category.
This transformer will create Shopware translations from Alumio localization. Shopware - Prepare convert - Category from Alumio Base Category
This transformer will check the parent and map it into the Shopware ID. Shopware - Convert - Category - from Alumio Base Category
This transformer will finally convert the Category from Alumio Base into Shopware. Shopware - Check and send - Category
- This transformer will check the current Shopware category ID from the previous iteration of this transformer to determine whether we need to create or update the category in the Shopware System.
- An example of a creation payload will look like this.
Automatic Categories Synchronization Setup
- Go to “Integrations → Schedulers → Akeneo - Fetch Categories”.
- Set a schedule expression and enable the configuration.
- Go to “Integrations → Schedulers → Shopware - Send - Categories”.
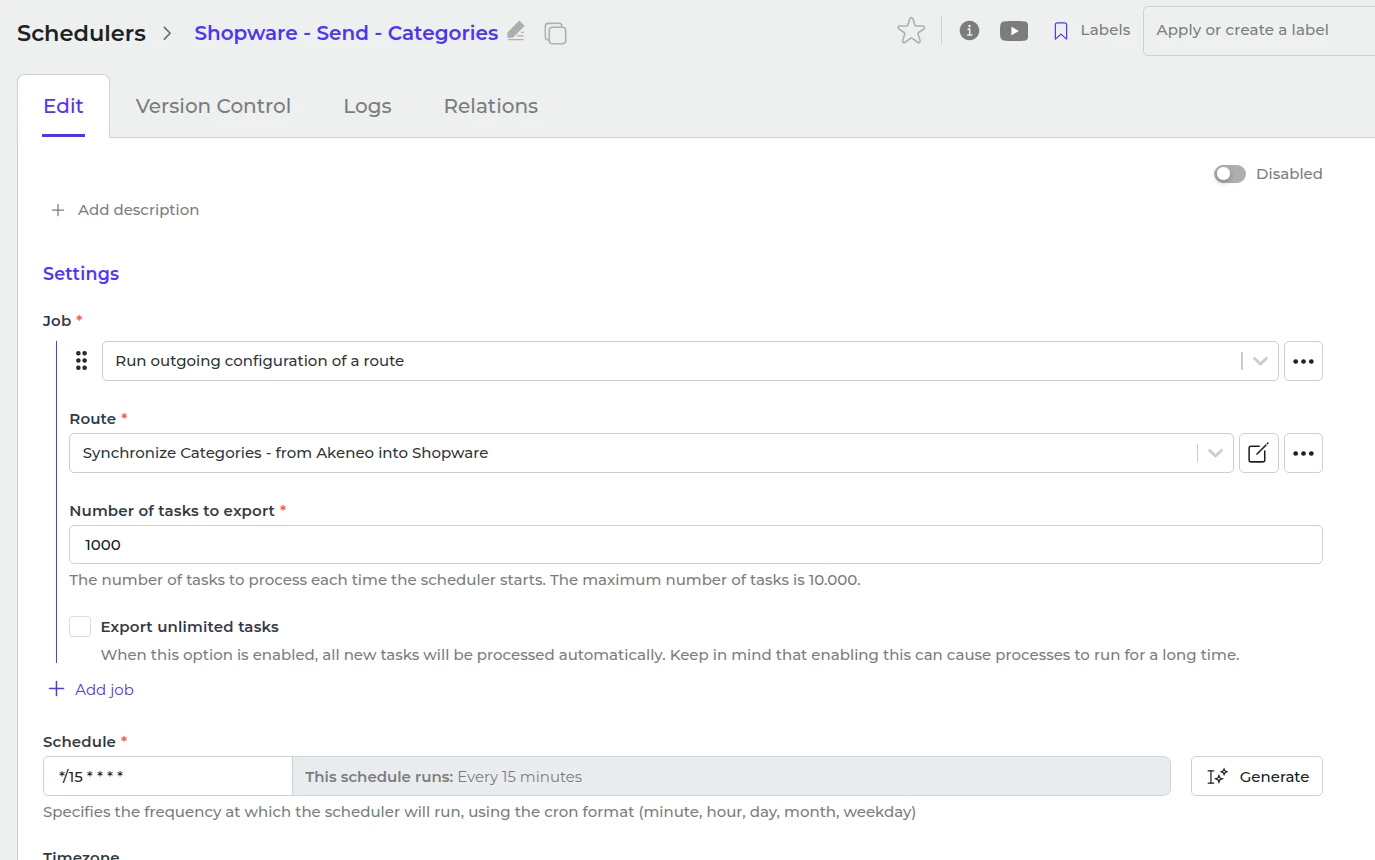
- Set a schedule expression and enable the configuration.