> ## Documentation Index
> Fetch the complete documentation index at: https://docs.alumio.com/llms.txt
> Use this file to discover all available pages before exploring further.
# Proxies
### Overview
The Proxies package provides pre-configured examples for building integrations that route, control, and manage HTTP traffic through a proxy layer in Alumio. These examples show how Alumio can inspect incoming requests, apply matching rules, and enforce limits before forwarding traffic to a target system.
Proxies act as an intermediary layer between external systems and Alumio, allowing you to control how requests are received, validated, and processed. This package includes examples for header-based request matching and method-based request limiting. These templates provide a starting point for building proxy configurations and can be customized based on your routing, security, and traffic control requirements.
### General Information
The Proxies package shows how different Alumio components work together when managing proxied HTTP traffic:
* **Proxy Configuration** –– defines how incoming requests are received and routed through Alumio.
* **Header Matcher** –– inspects incoming request headers and routes or filters traffic based on defined matching rules.
* **Method Limiter** –– restricts or controls which HTTP methods are allowed to pass through the proxy.
These examples help simplify the process of securing and controlling traffic between external systems and Alumio, allowing you to define rules for how requests should be handled before further processing.
### Package Contents
The package includes the following example configurations:
**1. HTTP Proxy Header Matcher**
Shows how to configure a proxy that matches incoming requests based on specific HTTP header values. This example can be used to route, allow, or reject requests depending on whether a defined header condition is met.
Use cases:
* Routing requests based on custom or standard headers.
* Validating that required headers are present before processing.
* Separating traffic from different clients or systems using header values.
* Applying conditional logic based on header content.
**2. HTTP Proxy Limit Method**
Shows how to configure a proxy that restricts incoming requests based on the HTTP method used, such as GET, POST, PUT, or DELETE. This example can be used to control which types of requests are permitted through the proxy.
Use cases:
* Restricting endpoints to specific HTTP methods.
* Preventing unsupported or unwanted request types.
* Enforcing method-based access control.
* Reducing exposure to unnecessary request handling.
### Typical Use Cases
The Proxies package can be used for various integration scenarios, including:
* Controlling and validating inbound HTTP traffic.
* Routing requests based on header conditions.
* Restricting access by allowed HTTP methods.
* Securing endpoints against unsupported request types.
* Building a controlled entry point for external systems calling into Alumio.
### Customization
These configurations are designed as reusable templates. After importing the package, you can customize:
* Header names and matching conditions.
* Allowed or blocked HTTP methods.
* Routing and forwarding rules.
* Response handling for non-matching requests.
* Additional validation and security logic.
This allows you to adapt the examples to your own proxy and traffic control requirements while following Alumio's recommended integration approach.
### Integration Flow Example
A typical Proxies integration flow works as follows:
1. Proxy configuration receives the incoming HTTP request.
2. Header Matcher or Method Limiter validates the request against defined rules.
3. Matching requests are forwarded to the target Incoming Configuration or system.
4. Non-matching requests are rejected or handled according to the configured response.
Using these templates, you can quickly create controlled, secure proxy layers in Alumio while following a reusable and configurable integration approach.
## Template Import
Follow these steps to import a template to Alumio:
1. Log in to your Alumio dashboard.
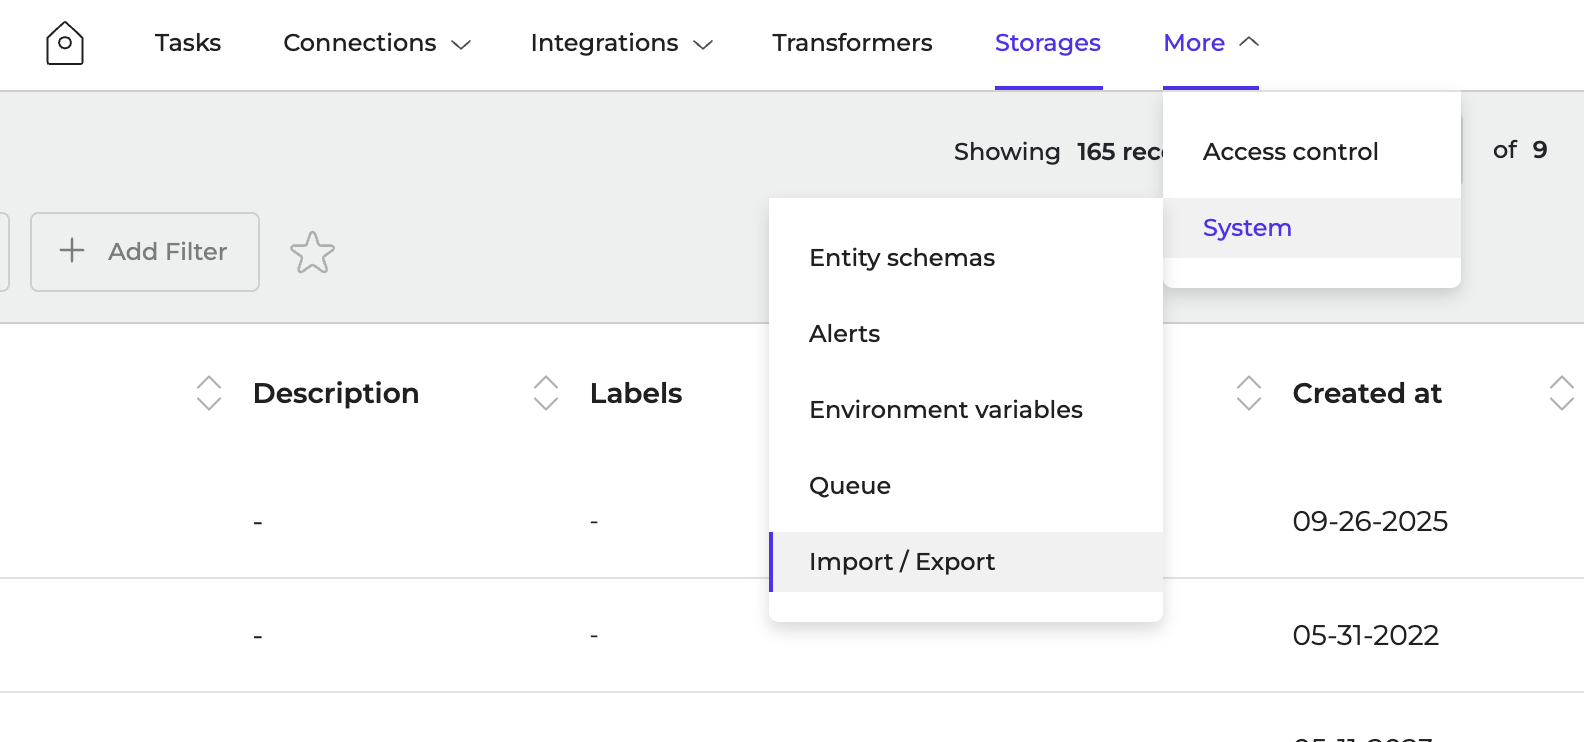
2. Navigate to **More > System > Import/Export**
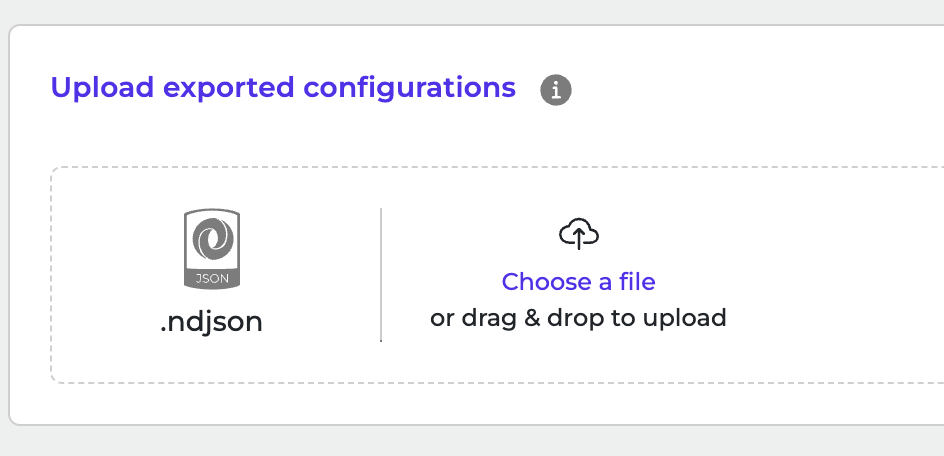
 3. Click to browse or drag and drop **ndjson** file to upload it.
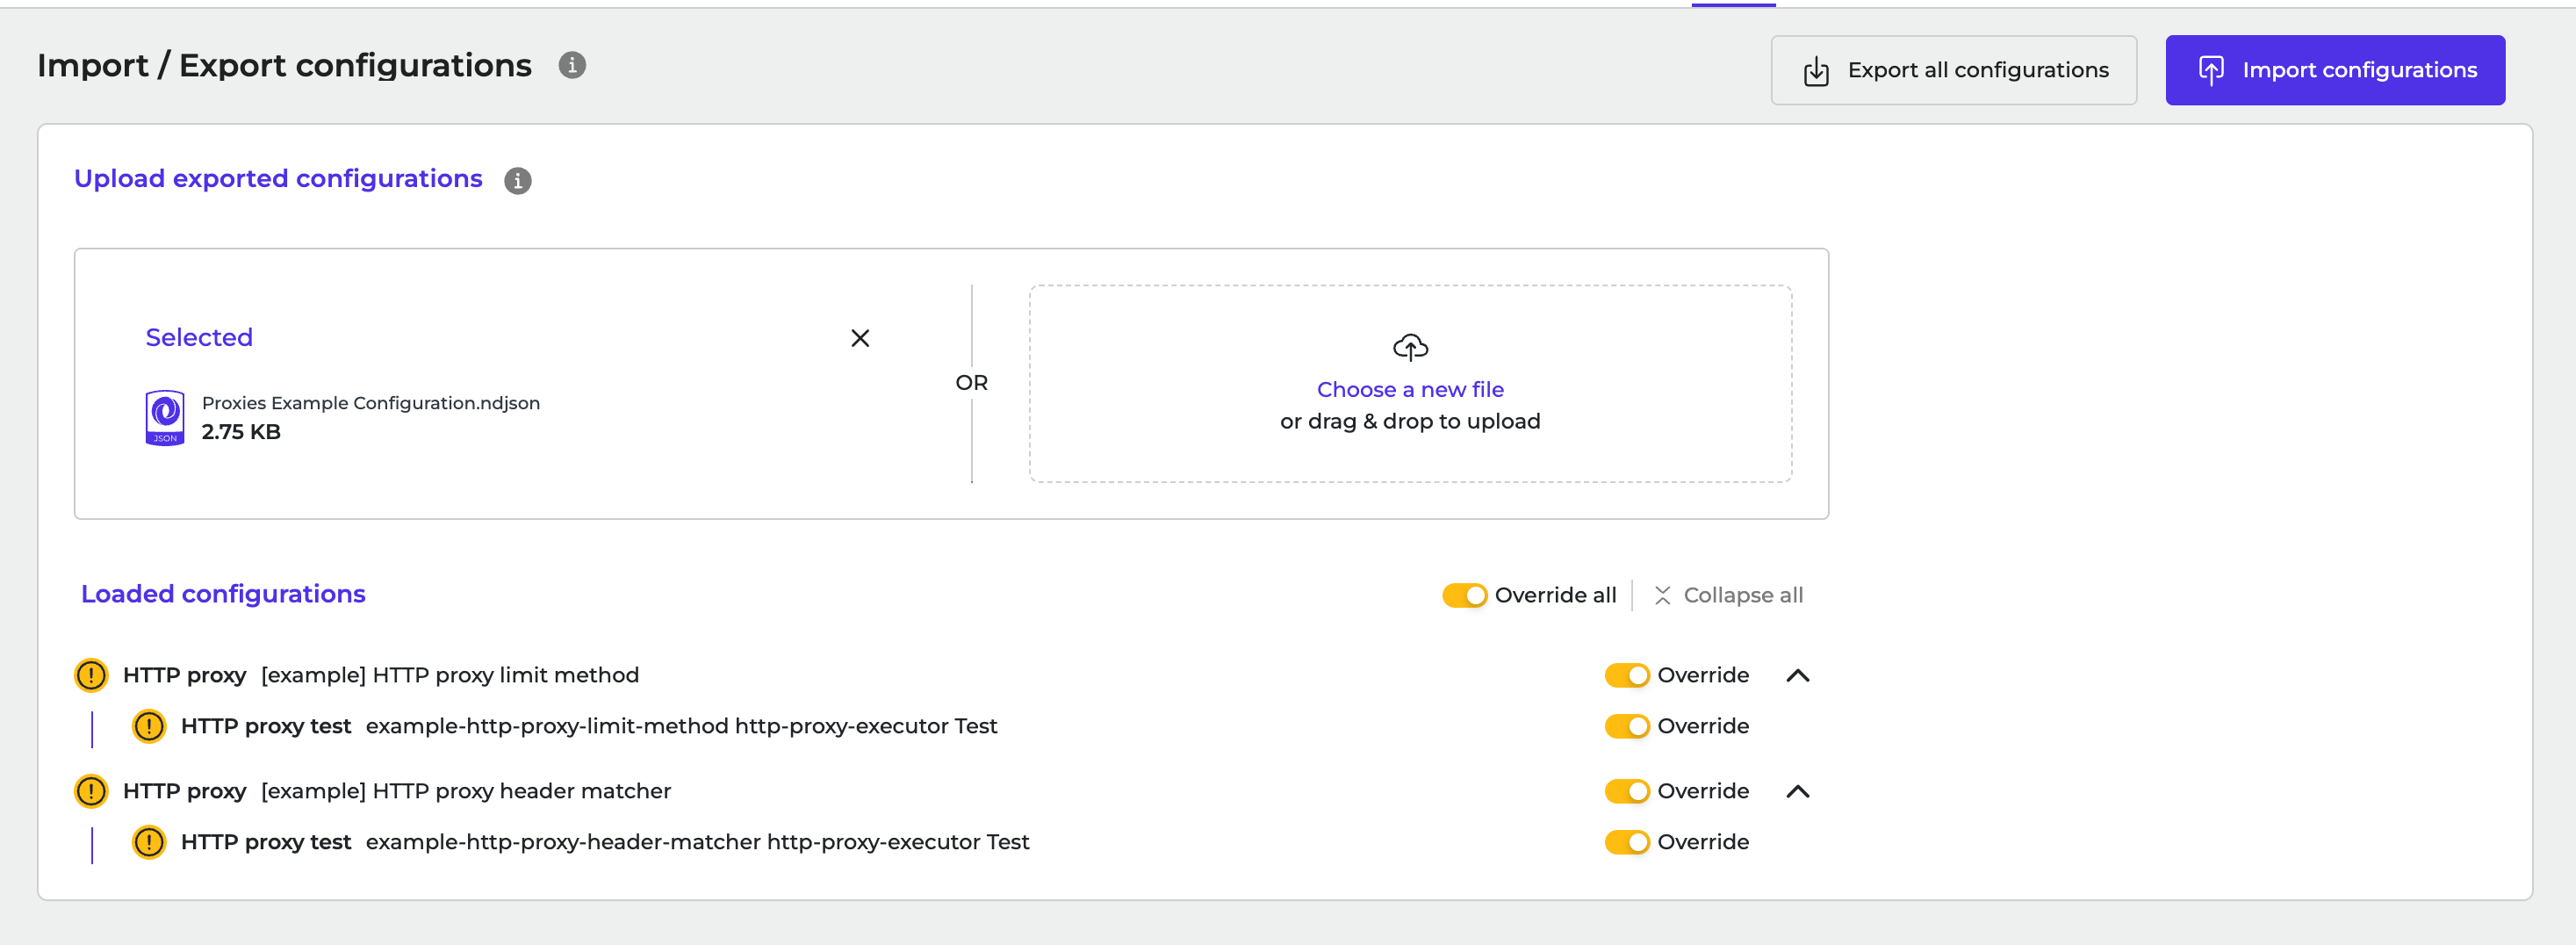
 4. Click **Import Configurations** to start the import.