> ## Documentation Index
> Fetch the complete documentation index at: https://docs.alumio.com/llms.txt
> Use this file to discover all available pages before exploring further.
# OpenAI
> Connect Alumio to OpenAI.
## Extra information
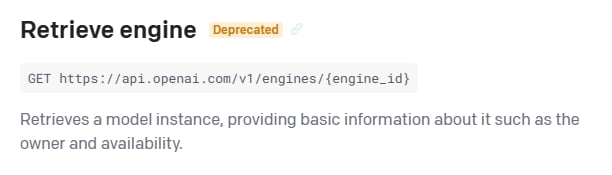
System documentation: [https://beta.openai.com/docs/introduction](https://beta.openai.com/docs/introduction)
## Connector package documentation
### Table of Contents
* **1.** Setting up HTTP Client OpenAI
* **1.1** Steps
* **2.** Subscribing to entities from OpenAI
* **2.1** Steps
* **2.2** Select the OpenAI HTTP Client to use.
* **3.** Publishing entity to OpenAI
* **3.1** Steps
* **3.2** General concept
### 1. Setting up HTTP Client OpenAI
**1.1 Steps**
1. In Alumio Dashboard, go to Clients > HTTPS Client. Create a new HTTP Client and select OpenAI HTTP Client as the prototype of the HTTP Client.
2. Fill in the Base URI, Token, and Organization ID (optional).
* Organization ID is only used for users who belong to multiple organizations to specify which organization is used for an API request.
### 2. Subscribing to Entities from OpenAI
**2.1 Steps**
1. Go to Connections -> Incoming and create a new incoming configuration and select OpenAI Subscriber as the subscriber.
2. Select the entity you want to subscribe to from OpenAI.
3. Add any request parameters needed to subscribe to the entity (optional).
4. You can optionally add a transformer to transform the request parameters into something you need.
**2.2 Select the OpenAI HTTP Client to use. General Concept**
We follow OpenAI documentation on building this connector so you can easily use the connector based on OpenAI API Reference.
**Entity**
It’s the entity you want to subscribe from OpenAI. Please refer to the entities in Management APIs from the OpenAI API Reference page.
**Request Parameters**
These are the parameters you can provide to get the needed entity based on OpenAI API Reference. Please look at the example below on how to fill Request Parameters field when subscribing Single Request entity
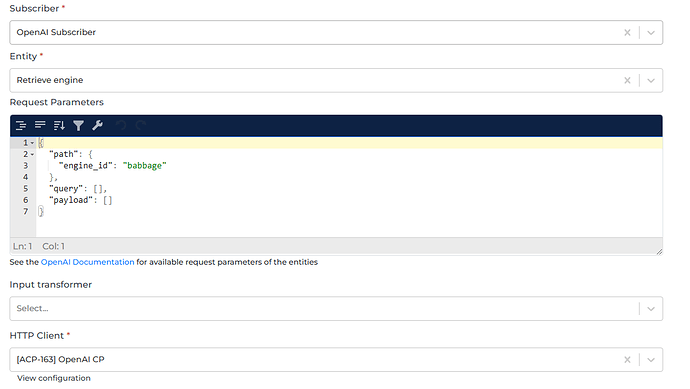 * Path is the path parameter of the url. For example, the \{id}.
* Query is a defined set of parameters attached to the end of a url.\
Example: [www.url.com?type=true\&start=0](http://www.url.com?type=true\&start=0)
* Path is the path parameter of the url. For example, the \{id}.
* Query is a defined set of parameters attached to the end of a url.\
Example: [www.url.com?type=true\&start=0](http://www.url.com?type=true\&start=0)
 That’s why we need to define **engine\_id** property inside **path** property in the Request Parameters field. The properties inside **query** parameters will be parsed as query parameters. Here is the final URL that will be called when using such Request Parameters field on the coupon entity.
`/v1/engines/babbage`
**Input Transformer**
Any transformer’s set here will be executed after the Request Parameters are loaded. So, you basically can add any transformer to provide and transform the request parameters into anything you need, either as path parameters and/or as query parameters of an entity.
**HTTP Client**
It’s the HTTP Client configuration or prototype you will use to access OpenAI.
### 3. Publishing Entity to OpenAI
**3.1 Steps**
1. Go to Connections -> Outgoing, create a new outgoing configuration, and select OpenAI Publisher as the publisher.
2. Select the action that you want the publisher to do with the data.
3. Select the OpenAI entity you want the data to be published to.
4. Select the HTTP Client to use.
That’s why we need to define **engine\_id** property inside **path** property in the Request Parameters field. The properties inside **query** parameters will be parsed as query parameters. Here is the final URL that will be called when using such Request Parameters field on the coupon entity.
`/v1/engines/babbage`
**Input Transformer**
Any transformer’s set here will be executed after the Request Parameters are loaded. So, you basically can add any transformer to provide and transform the request parameters into anything you need, either as path parameters and/or as query parameters of an entity.
**HTTP Client**
It’s the HTTP Client configuration or prototype you will use to access OpenAI.
### 3. Publishing Entity to OpenAI
**3.1 Steps**
1. Go to Connections -> Outgoing, create a new outgoing configuration, and select OpenAI Publisher as the publisher.
2. Select the action that you want the publisher to do with the data.
3. Select the OpenAI entity you want the data to be published to.
4. Select the HTTP Client to use.
 **3.2General Concept**
Like the subscriber, the publisher has similar methods on how to use it. The difference is the payload that will be submitted by the publisher originating from the data (from routes, from transformers in outgoing configuration).
**Action**
Currently, we support Create (HTTP POST method), and Delete (HTTP DELETE method).
**Entity**
We support publishing to most OpenAI endpoints but not with publishing binary files at the moment. Please refer to the entities in Management APIs from OpenAI API Reference page. Based on the documentation, some endpoints may need one or more path parameters.
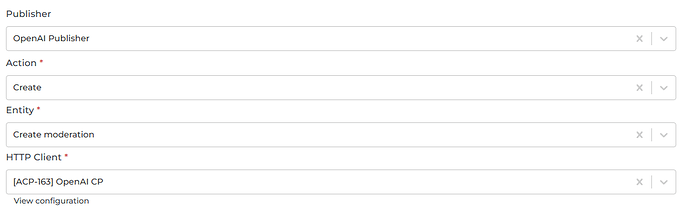
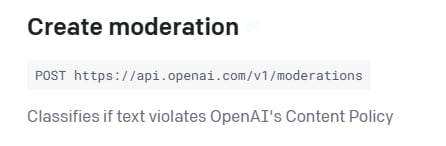
For endpoints that require an object as the request payload, please look at the example below. For example, we want to Create a Thread. Please select “Create” as the action and “Create moderation” as the entity of the publisher.
**3.2General Concept**
Like the subscriber, the publisher has similar methods on how to use it. The difference is the payload that will be submitted by the publisher originating from the data (from routes, from transformers in outgoing configuration).
**Action**
Currently, we support Create (HTTP POST method), and Delete (HTTP DELETE method).
**Entity**
We support publishing to most OpenAI endpoints but not with publishing binary files at the moment. Please refer to the entities in Management APIs from OpenAI API Reference page. Based on the documentation, some endpoints may need one or more path parameters.
For endpoints that require an object as the request payload, please look at the example below. For example, we want to Create a Thread. Please select “Create” as the action and “Create moderation” as the entity of the publisher.
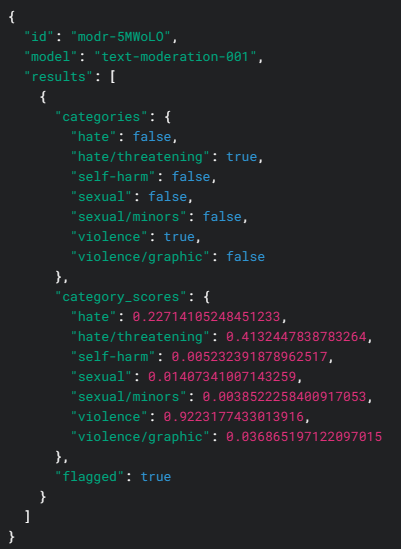
 You can put the payload you want to send to OpenAI into the payload property in the data. Here is an example of the Possible Response after Creation.
 * Path is the path parameter of the url. For example, the \{id}.
* Query is a defined set of parameters attached to the end of a url.\
Example: [www.url.com?type=true\&start=0](http://www.url.com?type=true\&start=0)
* Payload is the data contained within a request.
Alumio will send an API request to OpenAI with URL `/v1/moderations`
**HTTP Client**
It’s the HTTP Client configuration or prototype you will use to access OpenAI.
* Path is the path parameter of the url. For example, the \{id}.
* Query is a defined set of parameters attached to the end of a url.\
Example: [www.url.com?type=true\&start=0](http://www.url.com?type=true\&start=0)
* Payload is the data contained within a request.
Alumio will send an API request to OpenAI with URL `/v1/moderations`
**HTTP Client**
It’s the HTTP Client configuration or prototype you will use to access OpenAI.